![Baleno[2022-2026]](http://gearguard.in/cdn/shop/files/Baleno_2022-2026.png?v=1777635789&width=200)
![Brezza[2022-2026]](http://gearguard.in/cdn/shop/files/Brezza_2022-2026.png?v=1777637174&width=200)
![Creta[2024-2026]](http://gearguard.in/cdn/shop/files/Creta_2024-2026.png?v=1777713717&width=200)
![Exter[2023-2026]](http://gearguard.in/cdn/shop/files/Exter.png?v=1777645484&width=200)
![Fortuner[2021-2026]](http://gearguard.in/cdn/shop/files/Legender.png?v=1778747602&width=200)
![Fronx[2023-2026]](http://gearguard.in/cdn/shop/files/Fronx_2023-2026.png?v=1777638905&width=200)
![Hycross[2023-2026]](http://gearguard.in/cdn/shop/files/Hycross_2023-2026.jpg?v=1777557791&width=200)
![Nexon[2023-2026]](http://gearguard.in/cdn/shop/files/Nexon_2023-2026.png?v=1777635665&width=200)
![Punch[2026]](http://gearguard.in/cdn/shop/files/Punch_2026.png?v=1777630802&width=200)
![Punch EV[2026]](http://gearguard.in/cdn/shop/files/Punch_EV.png?v=1777630147&width=200)
![Scorpio N[2022-2026]](http://gearguard.in/cdn/shop/files/Scorpio_N_96b71b0a-5d36-4f8e-a41b-3f5fc39c0831.png?v=1777642812&width=200)
![Seltos [2026]](http://gearguard.in/cdn/shop/files/Seltos_2026.png?v=1778675640&width=200)
![Sierra[2025-2026]](http://gearguard.in/cdn/shop/files/Sierra_0db54e3f-e999-45ae-8ef1-f06b6e28199b.png?v=1777627108&width=200)
![Thar Roxx[2024-2026]](http://gearguard.in/cdn/shop/files/Roxx.png?v=1777639012&width=200)
![Venue [2025-2026]](http://gearguard.in/cdn/shop/files/VEnue_2025-2026.png?v=1777710547&width=200)
![Victoris[2025-2026]](http://gearguard.in/cdn/shop/files/Victoris_04f492a2-b2db-4773-bb1b-370ce591512a.png?v=1778681431&width=200)
![Windsor[2024-2026]](http://gearguard.in/cdn/shop/files/Windsor_2024-2026.png?v=1777647916&width=200)
![XEV 9E[2024-2026]](http://gearguard.in/cdn/shop/files/XEV_9e.png?v=1777542858&width=200)
![XEV 9S[2025-2026]](http://gearguard.in/cdn/shop/files/9S.png?v=1777642627&width=200)
![XUV 7XO[2026]](http://gearguard.in/cdn/shop/files/XUv_7Xo_image.png?v=1777475598&width=200)


How to Apply Tyre Stickers (Without Bubbles or Peeling)
Permanent tyre stickers can transform how your car looks in under 30 minutes — if applied correctly. Here's the exact process to get a clean, bubble-free, long-lasting finish at home.
Shop Tyre Stickers
What You Need Before You Start
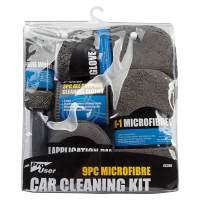
Applying tyre stickers is a home job — no mechanic or tools required. Before you begin, gather these:
- Your Gear Guard permanent tyre sticker set (comes pre-cut for all 4 tyres)
- A bucket of soapy water or a dedicated tyre cleaner
- A dry microfiber cloth or old towel
- A hard card (old gift card or credit card) for smoothing
- Isopropyl alcohol wipe (optional but recommended for grease removal)
Step-by-Step: How to Apply Tyre Stickers
- Wash the tyre sidewall thoroughlyUse soapy water to remove all dirt, brake dust, and road grime from the sidewall area where the sticker will go. This is the step most people rush — and the main reason stickers peel later.
- Dry completelyWipe the sidewall dry with a microfiber cloth, then let it air-dry for 5-10 minutes. Any moisture left under the sticker will cause it to lift within days.
- Degrease with alcohol wipeRubber tyres naturally release oils. A quick wipe with isopropyl alcohol removes this residue so the adhesive can bond directly to the rubber.
- Position the sticker without removing the backingHold the sticker against the sidewall first to check centering and letter spacing before committing. Use the tyre's raised lettering or rim edge as a guide.
- Peel and stick from one endSlowly peel the backing paper while pressing the sticker down from one end to the other — this prevents trapping air underneath.
- Smooth out with a cardUse a hard card to push out any air bubbles, working outward from the center of each letter.
- Let it set for 24 hoursAvoid driving on rough roads or washing the car for a full day so the adhesive cures completely into the rubber texture.
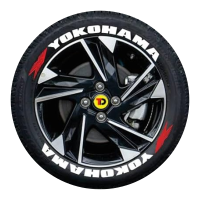
Choose Your Tyre Sticker Design
Gear Guard's permanent tyre stickers come as a complete set for all 4 tyres, in several popular designs — all using the same application process above.

Black Listed Tyre Sticker
Available in Yellow, White, or Red/White lettering. Complete set for all 4 tyres.
₹1,999 Shop Now
Sports Tyre Sticker
Bold "SPORTS" lettering set for a race-inspired look. Complete set for all 4 tyres.
₹1,699 Shop Now
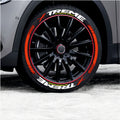
Xtreme Tyre Sticker
Available plain or with a strip accent. Complete set for all 4 tyres.
₹1,699 Shop Now
Sparco Tyre Sticker
Motorsport-inspired branding set. Complete set for all 4 tyres.
₹1,999 Shop Now
Toyota Racing Development-styled lettering. Complete set for all 4 tyres.
₹1,999 Buy Now
Simple accent strip for a subtle sporty upgrade. Complete set for all 4 tyres.
₹1,499 Buy Now
Clean white accent strip for lighter-coloured wheels. Complete set for all 4 tyres.
₹1,499 Buy NowCommon Application Mistakes to Avoid
| Mistake | What Happens | Fix |
|---|---|---|
| Applying on a dirty tyre | Sticker doesn't bond, peels within days | Wash and dry sidewall fully before applying |
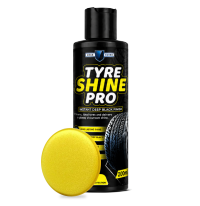
| Applying right after tyre shine/dressing | Adhesive slides off the oily surface | Wait at least 48 hours after tyre dressing |
| Pressing from the middle outward unevenly | Air bubbles trapped under lettering | Peel and press from one end steadily to the other |
| Driving immediately after application | Sticker shifts before adhesive cures | Wait 24 hours before driving on rough roads |
| Applying in direct hot sun | Adhesive softens, letters distort | Apply in shade or early morning/evening |
Frequently Asked Questions
Get Your Tyre Sticker Set
Complete sets for all 4 tyres, in multiple designs — easy to apply at home.
Shop Tyre Stickers


